Facebook Forms
Creating the form in Form Tools
The first step is to create our form. As mentioned earlier, this module is compatible with any type of Form Tools form (API or POST, Internal or External), but to keep it simple, we're going to create an Internal form: this is a form that is created and managed entirely through Form Tools. Once it's set up, we're going to get it listed on Facebook. (To learn more about the difference between Internal and External forms, give this page a read over).
If you're in a rush and don't want to fuss around with all the details of configuring this example form, just complete steps 1-2 on this page then continue on. Your form won't be complete, but you'll still get a good idea how it all works.
| Step | Instructions | Screenshot | ||||||
|---|---|---|---|---|---|---|---|---|
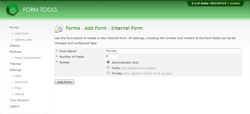
| 1 | Log into Form Tools on your site and click on the Add Form link in the left navigation menu. There, select the Internal form option. | |||||||
| 2 |
On the following page, enter the following information:
|
|||||||
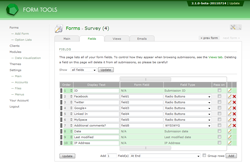
| 3 | After you submit the previous page, you'll be redirected to the Edit Form page. There, click on the Fields tab. This is where you configure your form fields to store whatever information you want. At this step, just enter the Display Text and Field Type columns as shown in the screenshot. Note: if you don't have the tinyMCE Field module installed, you won't see the "WYSIWYG" option to select for the "Additional Comments?" row. Just select the Textarea option instead. | |||||||
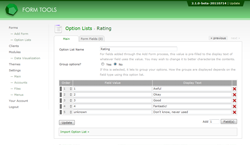
| 4 | Next we need to create the Option Lists for the radio and dropdown fields. Click on "Option Lists" in the navigation menu. There, create a new Option List with the values shown in the screenshot to the right. These are the options that will be available for our "Ratings" fields (rows 2 to 6 on the Edit Form -> Fields page). | |||||||
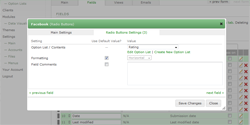
| 5 | Now, return to the Edit Form -> Fields tab, click the edit icon for the Facebook row and on the second tab, select the new "Ratings" Option List you created in the previous step. Do the same for the next 4 fields (Twitter, Google+, Linked In, MySpace). Tip: it's fastest to just click the "next field" link to go from one field to the next. When you're done, click "Update". |
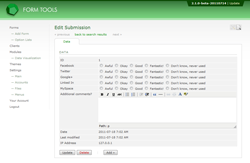
Okay! Our form is now set up. On the Edit Form -> Fields tab, click the grey icon at the top right. That lets you toggle between editing the form and viewing the form data. On the View data page, click the "Add »" button to create a new submission in your form. You should get redirected to a page that looks like the screenshot to the right. It's not perfect, but we're getting there!
