Facebook Forms
Touch-ups
At this stage, your form now appears on Facebook, submissions are being sent to Form Tools and the people submitting the form are redirected to a generic "thanks!" page. So far so good. But you may want to make a few small changes to your form. The following sections explain how to do different things.
1. Adding a "Like" button
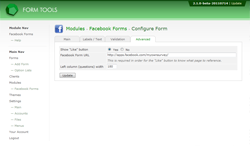
The "Like" button is a great way to promote your form, and adding it is very simple. Back in the Form Tools Facebook Forms module, edit your form configuration and click on the "Advanced" tab. There, set the "Show Like Button" to "yes" and enter the full URL of your Facebook Canvas Page in the field below (i.e. the URL you enter in your browser to see the form). Click save and you're done! A "Like" button will appear at the bottom of your form, as shown in the screenshot at the top of the page.
2. Customizing the form labels and text
The Facebook Forms module gives you a lot of control over what is actually output to your form. Just click on the "Labels/Text" tab to see what is available.
3. Forcing the user to fill in certain fields
As mentioned at the top of the "Validation" tab, at the time the module was developed the Form Tools Core doesn't support adding in field validation. This is slated for the next release, but you shouldn't have to wait that long! So to add validation, just check those fields you want to be required and add in the error message that should appear if they are not. Required fields will appear with a * red asterix next to the row label and will cause a "Please fill in required fields" dialog window to appear if the user attempts to submit the form without filling them in.
4. Customizing the Thankyou page
By default, the thankyou page is very plain. To customize the text that the user sees, just go to the ""Labels/Text" tab and in the Thankyou Page section, enter whatever you want!

