Form permissions (who sees what?)
Form Management
Form Tools 3.3 is planning to re-write the way Form Tools handles permissions to provide a more powerful and single location for all account permissions. But until that release, the following information is correct.
Form Tools lets you fine-tune the permissions to ensure that each user sees exactly what you want. Form permissions can be set in various places, on the:
- Form-level
- View-level
- Module-level
1. Form Permissions
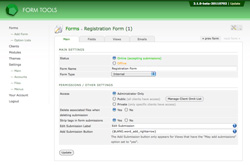
The standard form-level permissions is right on the forms themselves. In the screenshot to the right you'll see the Edit Form » Main tab. There, take a look at the Access field. That has three options:
- Administrator Only
- Public (all clients have account)
- Private (only specific clients have access)
This field assigns clients to the forms with a single broad stroke; only those client assigned to the forms will be able to access the form data. This setting affects the other two permissions listed above: Views and Export Groups. If you don't assign a client to the form, there's no point setting any further permissions - it won't matter!
There are two other things to touch upon:
- The Public option is a very convenient way to set the permissions for the form
for all client accounts, including those accounts that haven't been created yet.
So if you set your form to Public then create a new user account, that account will be
automatically assigned to the form. This cuts down on unnecessary pointing and clicking later on.
The public option also has a convenient Omit List option. This lets you keep the form as a public form, but excludes certain clients from seeing it. As we shall see, both the form and each form View have an optional omit list. - When selecting the "Private" option, you'll see two additional multi-select dropdowns appear where you can select a specific clients. This is a simple way to choose a subset of all your client accounts that can see the form. Depending on your needs, this may be the simplest way to assign the client's form permissions.
2. View Permissions
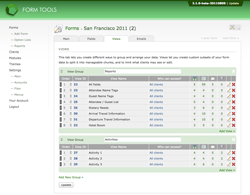
As mentioned elsewhere in the user documentation, Views let you create any number of subsets of the form data, to present the information in the most convenient clear manner for yourself and your clients. Every form has at least one View; every time you browse your form submissions you're looking at the information through a form View. You never look at the "raw" form data; it's always through a View: this is an important concept to understand. At first it may seem a little unnecessary and confusing, but it provides enormous control that wouldn't be possible otherwise.
Views let you create any number of subsets of your form data including options like hiding/showing particular form fields, grouping them in tabs, making some editable and others non-editable, changing their sort order and limiting the submissions that will appear based on whatever criteria you need. e.g. only show submissions Vancouver that have been send to the Humanities department of the university.
This extremely powerful functionality can be harnessed by the View permissions, letting you assign those information subsets to particular clients. View permissions work almost exactly like their parent forms. They have four options:
- Administrator Only
- Public (all clients have account)
- Private (only specific clients have access)
- Hidden (used for programmatic reasons, hidden from clients and admin)
The only difference is that the client accounts that this section affects is the subset of client accounts that are assigned to the parent form. So if you have, say, 100 client account by set the form to "Private" with 5 clients assigned to it. The "Public" setting will only let those 5 clients access the View. Likewise, the Private option will show a multi-select dropdown with only 5 client accounts listed.
3. Modules
Different modules may also have their own permissions. For example, the Data Visualization module lets you specify which users can see the visualizations; the Report Builder modules lets you target specific forms to which the module applies. You'll need to review each module to see what functionality it offers and see the permissions settings within (if it exists).
Export Manager
Another module that has its own permissions is the Export Manager. Controlling the Export Group permissions within this module is such a commonly used feature of the script, we thought we'd cover it here too.
The list of available export options found at the bottom of the submission listing page is customizable for each client. To change these settings go to Modules » Export Manager and edit the export group for which you want to change the permissions.
On that page, you'll see the (by now) familiar permission settings: Administrator only, Public and Private. Because the export groups are used for ALL forms, they will affect all clients, regardless of what form they are assigned to.


