How field types are used
External Forms
For External forms, the Add Form process automatically picks appropriate field types for each form, to mimic your original form as close as possible possible. In other words, textboxes will be mapped to the Form Tools "textbox" field type, radio buttons to radio buttons and so on. If you have specialized field types (e.g. a javascript date-picker or other non-plain HTML field types), Form Tools will ask you to pick a field type, or make its best guess. As with everything in Form Tools: you can always reconfigure the field types later, so don't worry!
Internal forms
Internal forms are different. When you create an Internal form it creates a form with a number of plain textboxes. The intention is to create the base settings for your form so you can go in and configure the fields types separately.
After the form has been added (External or Internal) you need to go to the Edit Form -> Fields tab to change the field types. That's where the action happens!
The Fields page
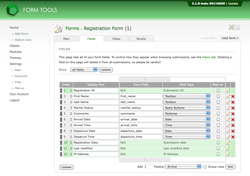
The Edit Form » Fields tab lists all of your form fields and all related settings. For more detailed information on this page, see the Fields page documentation. But for now, it's important to know this: you can edit your fields in two ways. The main page (shown in the screenshot) allows you to edit the main settings for the fields, but nothing more. These settings are shared by all field types, so they're shown in the main page. But with 2.1.0, each of the field types may also have custom settings that are particular to the field type. For example, a multi-select dropdown has a "Num Rows" field setting to control the height of the multi-select dropdown; a file upload field has an "Upload Folder" setting to let you customize the folder where the files get uploaded to. These settings are unique to those field types and no others. To see all these settings, just click the edit icon (the penultimate column). That will open a dialog window containing all settings. That dialog window is discussed in more depth on the next page.
So if you ever want to see every last option for the fields types, click that icon! For field types like checkboxes, radio button and dropdowns, you will need to open the dialog so that you can assign the data source (i.e. the options that appear in the field).
Okay, that gives you a general overview to how these field types are actually used. Now let's take a closer look at the Edit Field dialog, then onto the details of the actual field types.
