Submission Accounts
Configure a new form
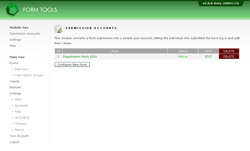
After installing the module, select it on the Modules page in the admin UI and click on the "Configure New Form" button found on the main Submission Accounts page. This is shown in the screenshot to the right.
The page that you are redirected to lets you configure the Submission Accounts module with one of your forms. Note that you can only configure each form ONCE. The next time you try to configure a form you'll notice that the form you previously configured is no longer available as a select option.
The Configure New Form page should look something like the screenshot to the left. This page contains the main configuration settings for setting up the Submission Account.
Let's review each setting one by one.
| Form | This lets you choose which form for which you'd like those users to be able to log in and edit their submissions. |
| View | This is an important setting! Views let you create custom subsets of the form data including choosing which form fields should be displayed, how they're grouped (tabs) and which fields are editable. Submission Accounts are associated with a View. This provides you with enormous control over the appearance of the UI for the user who logs in to view / edit his form submissions. Information like their IP address, submission date, last modified date and submission ID may not be pertinent - so you may wish to create a custom View that contains only those fields you want. |
| Theme | This is another powerful setting. Like the previous View setting, this lets you customize the appearance of the login page and backend pages for the user logging in. Depending on your requirements, you may feel it worthwhile to develop a theme that matches your website design so that logging in and editing the submission will be a smooth transition from the public side to the backend. You can read more about theme development here. |
| Email Field | This setting is optional, but recommended. It rather depends on whether your form contains an email field for the user or not. If you can select the email field here, you are given the option of including a "Forgot your password?" link on the login page that sends an email reminder to the user. |
| Username Field | This setting is required! You need to identify a field that will identify the user. The simplest solution - for both you and the user - is to specify the email field here. People generally don't forget their own email addresses, whereas usernames come and go. Also, this field does NOT have to be unique. The Submission Accounts login script identifies the users by the username + password combination, not just the username. So technically, you can have multiple (different) users that use the same username. |
| Password Field |
Most forms don't contain a "password" field, but the Submission Accounts module
requires it. If you already have a password field in your form, you're rosy. You
don't need to read on. If not, here's some potential solutions:
|
View Override Settings
The last section on the page is entitled "View Override Settings". This was added in version 1.1.0. What it does is allow you to use a different View for a submission depending on the values in that submission. This is a convenient way to show different information to a user depending on their form values.
It works very simply: you just pick the form field that you want to base the rule on, then choose the values that it contains. Finally, in the third column, specify the View that should be used to display the data IF the previous condition is met. And that's it!
There are a few more things to note:
- You can define as many rules as you want, but the order is important. The FIRST View rule that meets the criteria for a submission is the one that's used to display to the user.
- If none of the rules are met for a submission, it uses the default View.
- If the user themselves changes a field value that you have specified in the View Override section, they will automatically see the new View.
- To specify multiple values for a rule, just enter them with a pipe (|) delimiter, e.g. "Arts|Humanities|Sciences".

