Configuring client accounts to only edit their own form data
The next step is to configure one of your Views to:
- automatically store what Form Tools account created the submission, and
- only show submissions for the current client account.
Which View?
You can read more about Views here, but for this tutorial, you can edit any View you'd like - so perhaps just make these changes to the default All Submissions view. You can rename it or add more Views later once you get a better feel for how it all works.
Editing the View
Tracking show created the submission
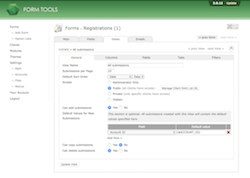
Now click on the Views tab within the Edit Form pages. There, edit one of the Views (we'll pick the default "All Submissions" View, as shown in the screenshots).
- On the General tab, set the Access field to public. This will allow all clients that have access to the form also have access to this particular View.
- Set the Can add submissions to yes.
-
In the Default Values for New Submissions setting, add the field as shown in the screenshot to the right,
namely: Field Account ID (the field you just created in the previous step) and default value:
{$ACCOUNT_ID}
{$ACCOUNT_ID} is a placeholder. It gets replaced with the user's account ID when the submission is created. For a full list of placeholders, see the section on the Default Values for New Submissions field.
- Click save.
You've now configured your View to store the account ID of whatever user just created the form through the Form Tools interface (admin or client). As mentioned before, submissions created from an external, API or Form Builder form won't have this value populated: it's only for submissions created within Form Tools.
Making the View only show submissions for the current user
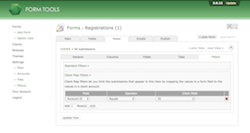
Click on the Filters subtab, add a row in the Client Map filters section with the following information:
- Field: Account ID (this is the field you added earlier)
- Operator: Equals
- Client Field: ID.
This tells the View to only show data where your new field contains the same ID as the client account. To test this, try going to the Accounts page and click the Login link for that user.

