Adding a POST form
This tutorial explains how to add a simple POST form for storage in Form Tools. This example uses a "contact us" form - but the actual form fields don't make any difference; the information supplied here works perfectly well for any sort of form data.
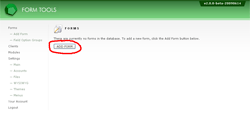
So! First step is to log into Form Tools and go to the Forms page. There, at the bottom of the page you should see a button labeled "Add Form" (see screenshot). Click it! This takes you to the first page in a series of pages, designed to simplify the process of adding and configuring your form. Each step needs to be completed to successfully add your form for storage by Form Tools. If you are unable to finish setting up your form in one sitting, no problem! The values you've entered for each page are stored in memory so you can pick up where you left off. Again, to keep things simple, the Add Form process only shows a subset of all configurable options; things like setting up auto-emails and Views can be set after the form has been successfully added.
The following pages examine each of the six steps of the Add Form process. For early devotees of the script, you may want to pay close attention to the following pages: the Add Form process has been significantly improved from earlier versions.
